Installation of Node js on Windows

Hey readers, in this article, we will be covering all about how to install Node js in Windows and how it works. Before jumping directly to the installation part, we will learn about Node js and the basics of what exactly Node js is and why to use it. So if you are new to all these concepts, don’t worry, we will be covering it right from the fundamentals and will then move to differences. So keep reading.
Introduction
Node js is an open-source organization and it provides a runtime environment for running JavaScript code beyond your browser. It is not a framework neither it is a programming language. It is mostly used in the backend for building API services, accessing databases, etc.
Uses cases/Applications
Both tech stacks are being widely used for developing web apps. Large tech giants like Netflix, Airbnb, and Instagram use this tech stack in their applications.
Why do developers use Node js?
Following are the reasons for choosing Node js over other backend languages:
- Easy to learn as it uses JavaScript
- Used for agile development and prototyping
- Provides fast and scalable services
- Asynchronous nature
- Uses “Single-threaded-event-loop” architecture
Node js helps developers build large complex applications with ease by using microservices. It can handle thousands of requests coming to the server without slowing down the system. Using microservices in Node js, one can easily scale a large-scale system and can divide it into different chunks for feature updates. It helps add independent features to the application without changing other services.
It is largely used by developers in the backend of an application. Due to its non-blocking I/O and asynchronous nature, it has become the primary language used on the server side. Tech giants like Netflix, PayPal, Linkedin, and Uber use it for building API and servers.
Features that Node js offers:
- API server
- Data streaming
- Microservices
- Building Real-time applications
Installation
On a computer, the Node can be installed in a variety of methods. The approach you use is determined by the system’s current development environment. For different environments, there are different package installers. By getting a copy of the source code and compiling the application, you can install Node. Another option for installing Node is to clone the GIT repository in each of the three environments before installing it.
Creating a Development Environment for Node js
Node For Windows (WINDOWS 10) Installation:
To install Node.js on your Windows computer, follow the steps below:
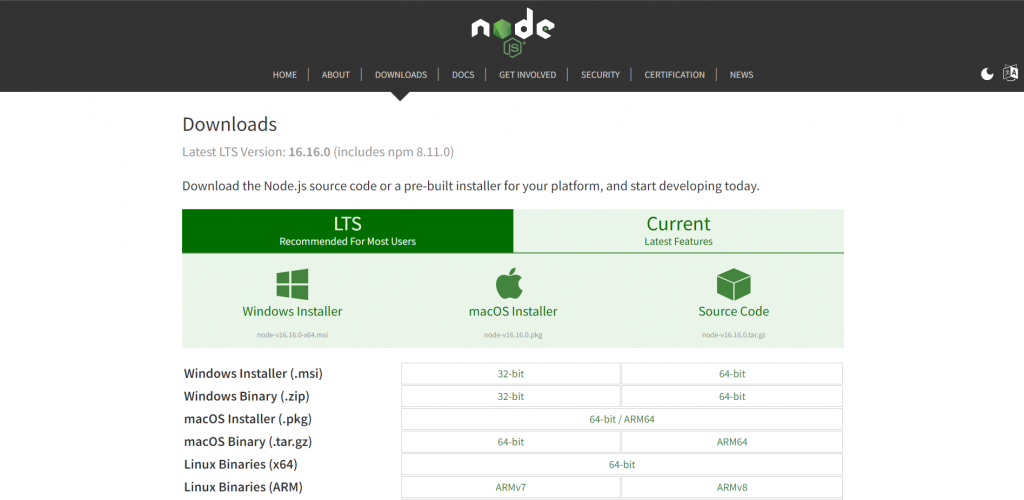
Step 1: Get the ‘.msi’ installer for Node.js.
To install Node.js on Windows, you must first download the installer. Download the.msi file for your system environment from the official Node.js website, https://nodejs.org/en/download/. (32-bit & 64-bit). On your computer, an MSI installer will be downloaded.

Step 2: Run the Node.js installer.
The node.js installer must now be installed on your computer. For Node.js to be installed, you must do the following:-
Double-click the.msi installer to run it and select next.

Check “I accept the terms in the License Agreement” and click on next

Select “Next” after selecting the Destination Folder where you wish to install Node.js.

Click on the next button on the window and install the Node js executable files in the folder.

Click on install

IMPORTANT:
“This step requires administrative rights,” a prompt will appear.
Authenticate as a “Administrator” at the prompt.
Getting Node.js up and running.
Do not close or cancel the installer until it has completed the installation.
Complete the Setup Wizard for Node.js.
Select “Finish” from the drop-down menu.

Step 3: Check to see if Node.js was installed correctly.
You may test whether node.js is fully installed on your machine by running the following line on your command prompt or Windows Powershell:
C:\Users\Admin> node -v
The command prompt will print the version of node.js installed if node.js was completely installed on your machine.
Step 4: Update the npm version locally.
The last step in installing Node.js is to update your local npm version (if necessary) – the package manager that comes with Node.js.
To fast update the npm package, use the following command.
npm install npm –global // Updates the ‘CLI’ client
IMPORTANT:
You don’t need to do anything with the system variables because the Windows installer takes care of them for you when you use the.msi installer.
If you install node.js on your PC using a different format, you should set the system variable path for node.js to:
PATH : C:\Users\[username]\AppData\Roaming\npm
C:\Program Files\nodejs (Path to the nodejs folder)
Conclusion
I hope you installed Node js on windows. If you have any query related to Node js or JavaScript, do drop it down in the comment section also do check out codedamn courses if you want to learn more about JavaScript and Node js with its use cases and amazing projects.
Sharing is caring
Did you like what mansi wrote? Thank them for their work by sharing it on social media.
No comments so far
Curious about this topic? Continue your journey with these coding courses:

