The Ultimate Three.js Crash Course

Do you ever feel confined to the flat realm of web development? If you’re seeking to enhance your abilities and craft breathtaking three-dimensional graphics and animations that’ll leave your audience in awe, look no further.
Undoubtedly, learning a new library, particularly in the realm of 3D graphics, can be intimidating. However, I’ve endeavored to create a crash course that is both enjoyable and captivating. Embark on a voyage through the thrilling realm of Three.js, where I’ll use relatable analogies and narratives to simplify even the most intricate ideas.
“Suppose I’m completely inexperienced in 3D and Three.js?” No worries! We’ll commence from the fundamentals by guiding you through the process of configuring your development environment and familiarizing you with the essential principles of geometry, materials, lighting, and cameras. As we progress, we’ll expand upon these building blocks, progressively augmenting the intricacy of our environments and animations until you’re able to produce incredible 3D encounters that will undoubtedly capture the attention of your users.
We understand that, as student developers, your time is valuable, and you don’t want to spend it on dull and uninspiring tutorials. That’s why I’ve strived to make this crash course as amusing as possible. You’ll find a generous helping of jokes, amusing anecdotes, and popular culture allusions interwoven throughout the course, ensuring that you remain engaged and entertained.
If you’re eager to elevate your abilities and become a Three.js virtuoso, get prepared for an exhilarating journey into the realm of Three.js with “The Ultimate Three.js Crash Course”! Fasten your seatbelt and get ready for an adventure that will take your skills to the next level.
Introduction
Let’s first create a new vite project:
npm create vite@latestCode language: Bash (bash)To begin with the Three.js library, we will first go over the installation steps. You can use any package manager like npm and yarn to complete this task, however, I will be demonstrating by installing the library using npm.
Enter the below-mentioned command on your terminal:
npm install threeCode language: Bash (bash)Once Three.js is installed, you can use it import it by using this piece of code:
import * as THREE from 'three';Code language: JavaScript (javascript)Voila! Now you can start experiencing the 3D magic inside your browser, let’s dive right into the concepts!
Geometry
Geometry serves as the cornerstone of every 3D scene, and the same applies to Three.js. However, don’t fret if you’re not a math genius or if you lack experience working with 3D geometry – we’ve got you covered!
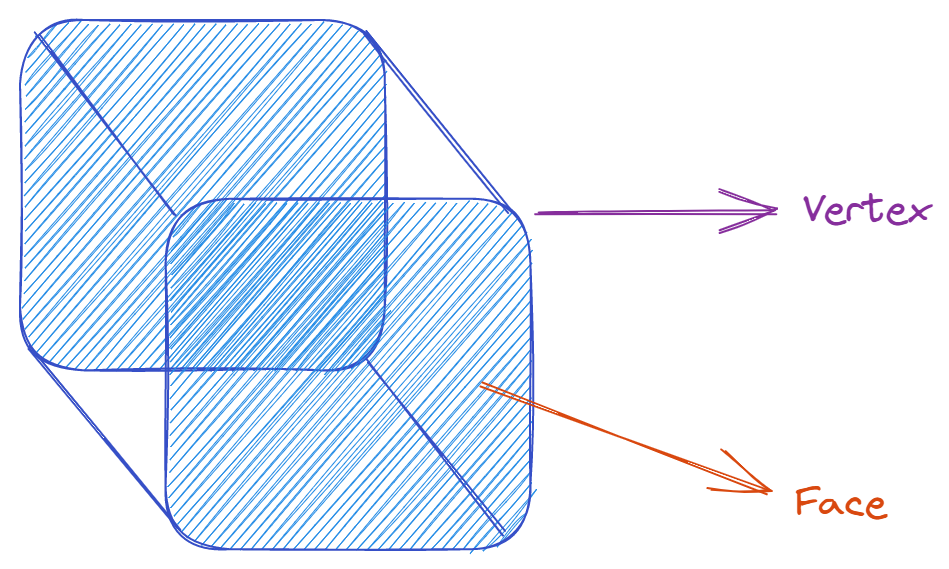
To begin, in Three.js, geometry is a compilation of points, lines, and faces that define an object’s shape. It’s akin to a digital sculpture that you can modify and manipulate to your heart’s content. You can produce elementary forms such as cubes, spheres, and cylinders, or more intricate objects like characters, vehicles, and structures. Now, let’s discuss vertices and faces. Vertices are the individual points that comprise a geometry, whereas faces are the flat surfaces that link those points. It’s akin to viewing faces as puzzle pieces and vertices as the locations where those pieces fit together.
Creating a Spherical Mesh
Creating a spherical mesh is one of the most basic and essential tasks in Three.js. But don’t worry, it’s super easy and fun! In fact, let’s create a simple spherical mesh together right now.
First, we’ll need to create a geometry object to define the shape of our sphere. We’ll use the built-in SphereGeometry class, which takes two arguments: the radius of the sphere and the number of segments that make up the sphere. The more segments you have, the smoother your sphere will be, but it will also be more computationally expensive.
const radius = 6;
const segments = 32;
const sphereGeometry = new THREE.SphereGeometry(radius, segments, segments);
Code language: JavaScript (javascript)
Next, we’ll create a material to give our sphere some color and texture. We’ll use the built-in MeshStandardMaterial class, which takes an object of properties as its argument. For now, let’s just give it a color.
const material = new THREE.MeshStandardMaterial({ color: 0xffffff });
Code language: JavaScript (javascript)
Now, we’ll combine our geometry and material into a mesh object using the built-in Mesh class.
const sphereMesh = new THREE.Mesh(sphereGeometry, material);
Code language: JavaScript (javascript)
And that’s it – we’ve created a simple spherical mesh! But let’s take it a step further and add it to our scene.
const scene = new THREE.Scene();
scene.add(sphereMesh);
Code language: JavaScript (javascript)
Now, if we render our scene, we should see our beautiful spherical mesh floating in space.
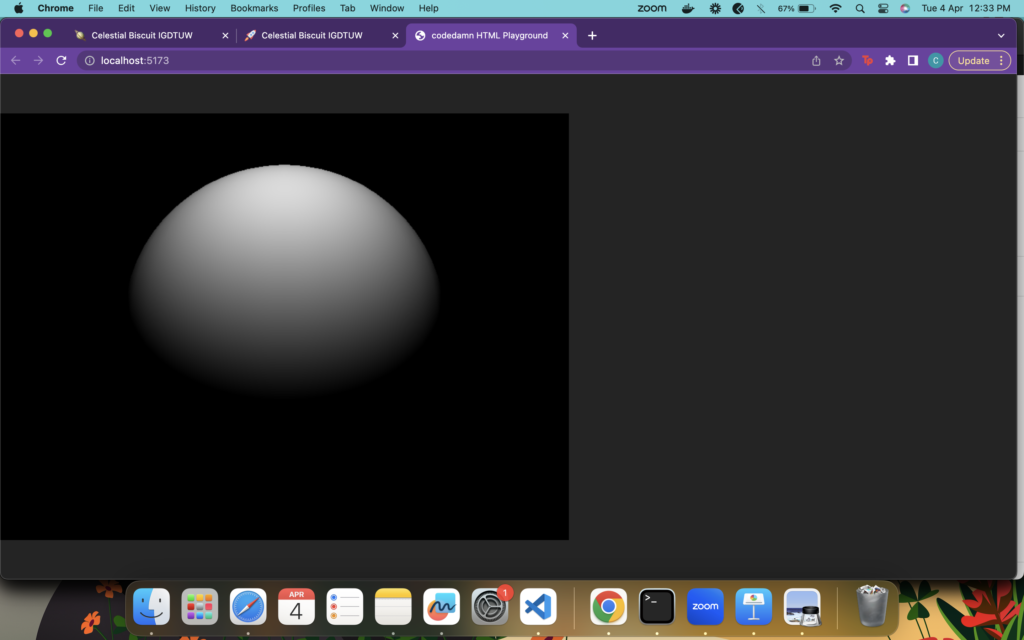
Please note that the piece of code we discussed above will not enable you to view this sphere in your browser, to do so, please add the following piece of code to your main.js file. We will discuss each and every aspect that has been mentioned here in the upcoming sections.
const camera = new THREE.PerspectiveCamera(45,800/600,0.1,100);
camera.position.z = 20;
const renderer = new THREE.WebGLRenderer({canvas});
const light = new THREE.PointLight(0xffffff,1,100);
light.position.set(0,10,10);
scene.add(light);

renderer.setSize(800,600);
renderer.render(scene,camera);

const loop = () => {
    renderer.render(scene,camera);
    window.requestAnimationFrame(loop);
}

loop()
Code language: JavaScript (javascript)
Creating a spherical mesh is just the tip of the iceberg when it comes to Three.js geometry. With the power of modifiers and custom geometries, you can create incredible shapes and objects that will take your 3D scenes to the next level. So get out there and start creating!
Creating a Complex Mesh
But what if you want to create more complex shapes than the basic primitives provided by Three.js? Well, that’s where geometry modifiers come in. These are like digital sculpting tools that allow you to manipulate the vertices and faces of a geometry to create more complex shapes. You can extrude, bend, twist, and warp your geometries in any way you want, giving you complete creative control over your 3D scenes. Here is a randomly warped custom shape:
const geometry = new THREE.BufferGeometry();
const vertices = new Float32Array( [
	-1.0, -1.0,  1.0,
	 1.0, -1.0,  1.0,
	 7.0,  4.0,  1.0,

	 1.0,  1.0,  1.0,
	-1.0,  1.0,  5.0,
	-1.0, -8.0,  1.0
] );

geometry.setAttribute( 'position', new THREE.BufferAttribute( vertices, 3 ) );
const material = new THREE.MeshBasicMaterial( { color: 0xff0000 } );
const mesh = new THREE.Mesh( geometry, material );
const scene = new THREE.Scene();
scene.add(mesh);Code language: JavaScript (javascript)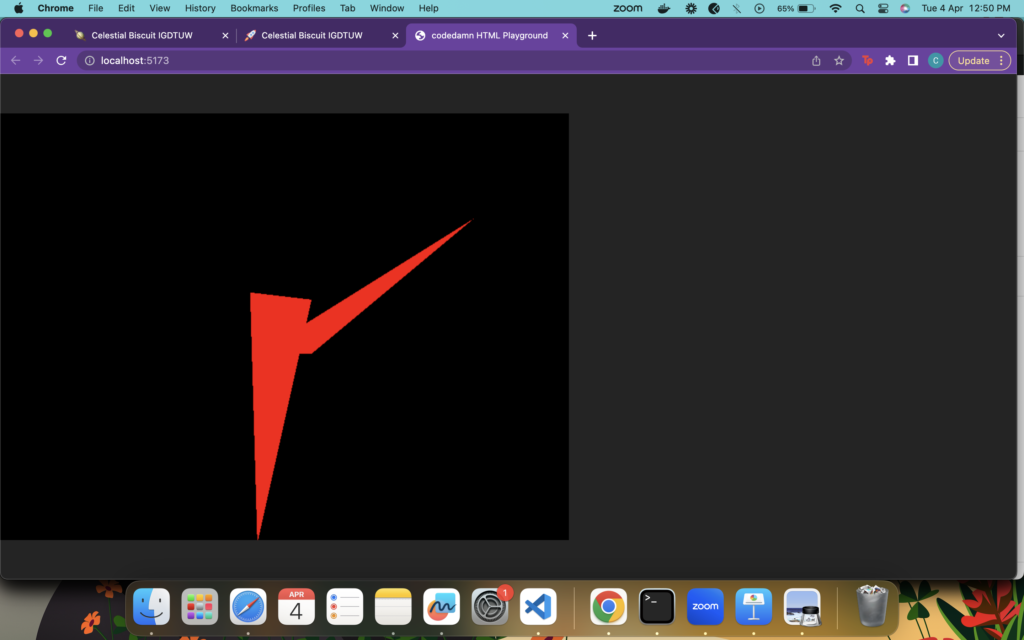
And if you’re feeling really adventurous, you can even create your own custom geometries from scratch using Three.js. This gives you the power to create completely unique objects that you won’t find anywhere else.
Materials
If geometry is the building block of any 3D scene, then materials are the paintbrush that brings that scene to life. In this section, we’ll explore the basics of Three.js materials and show you how to create beautiful and realistic 3D scenes.
Let’s start with the basics. In Three.js, a material is a wrapper around a shader program that defines how an object should be rendered. Think of it like a layer of paint that you apply to your 3D geometry to give it color, texture, and other visual properties.
There are several built-in material classes in Three.js that you can use to create different effects. For example, MeshBasicMaterial is a simple material that applies a flat color to an object, while MeshLambertMaterial is a more complex material that simulates diffuse lighting.
But the real power of materials comes from their ability to create complex and realistic surface textures. You can use textures to add bumps, scratches, and other surface details to your 3D objects, making them look more lifelike and interesting.
Creating a material in Three.js is easy. Here’s an example of how to create a basic MeshBasicMaterial:
const material = new THREE.MeshStandardMaterial({
    color: 0xf50514,
    roughness: 0.8,
    metalness: 0.2
});
Code language: JavaScript (javascript)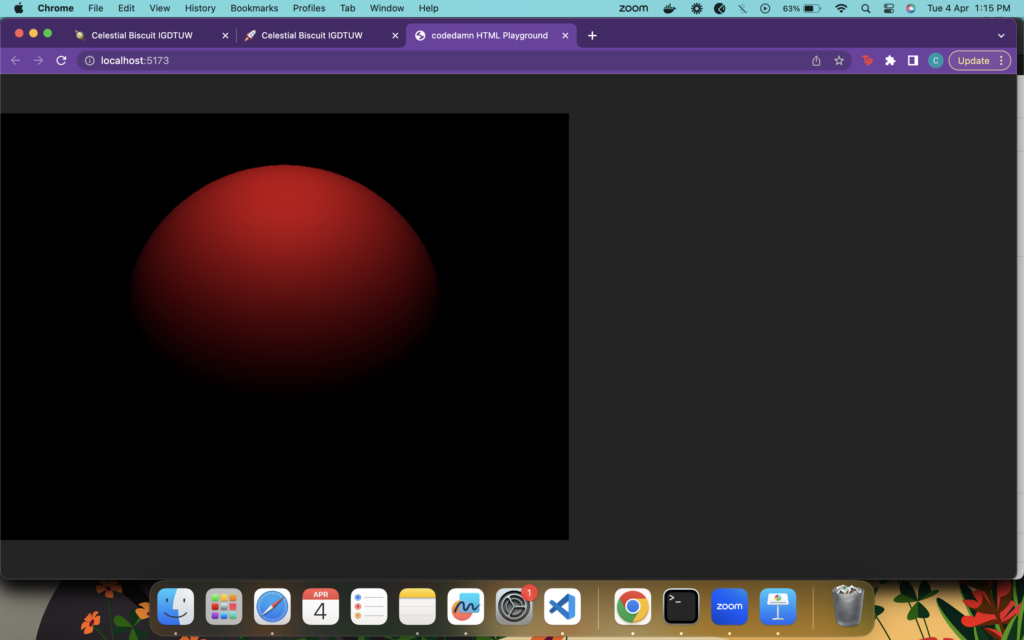
Camera
In Three.js, a camera is like a virtual “eye” that views the scene from a particular perspective. Think of it like a photographer’s camera – you can move it around, zoom in and out, and change its settings to get the perfect shot.
There are several types of cameras in Three.js, each with its own strengths and weaknesses. The most common type is the PerspectiveCamera, which simulates a realistic perspective view of the scene. This is the camera you’ll use most of the time when creating 3D scenes.
To create a camera in Three.js, you’ll need to specify its position and the direction it’s looking in. You’ll also need to specify the aspect ratio of the camera (the width divided by the height) and the field of view (how much of the scene is visible).
Here’s an example of how to create a basic PerspectiveCamera:
const camera = new THREE.PerspectiveCamera(
    75,
    window.innerWidth / window.innerHeight,
    0.1,
    1000
);

camera.position.z = 5;
Code language: JavaScript (javascript)
Let us now understand the arguments and the numbers that are present in the PerspectiveCamera constructor.
- Number 75 represents the
field of viewwhich is a measure of how much the camera can see. If you have used cameras with wide-angle shots, you must be aware that sometimes there is distortion over the edges, therefore it is recommended to keep this value between 45-75 for the most optimal results. - Next, we have the
aspect ratiofor our camera which has been set to window.innerWidth / window.innerHeight - 0.1 represents the
near pointof the camera and 1000 represents thefar pointof the camera denoting how much can we zoom in and out of our object without making it disappear.
Once you’ve created your camera, you can add it to the scene and use it to render your 3D objects. You can move the camera around, zoom in and out, and change its settings to get the perfect shot.
Rendering the Scene
If you’ve made it this far in this crash course, then you’re well on your way to becoming a 3D graphics pro. In this section, we’ll explore the basics of Three.js scenes and rendering and show you how to bring your 3D scenes to life.
A scene is like a stage where all your 3D objects perform. Think of it like a movie set – you can add lights, cameras, and other special effects to create a visually stunning and immersive experience for your users.
To create a scene in Three.js, all you need to do is create a new instance of the Scene class:
const scene = new THREE.Scene();
Code language: JavaScript (javascript)
Once you’ve created your scene, you can add objects to it and manipulate them in various ways. For example, you can position objects in 3D space, apply materials to them, and animate them over time.
But creating a scene is only half the battle – you also need to render it. Rendering is the process of taking the 3D scene you’ve created and turning it into a 2D image that can be displayed on a screen. Think of it like taking a picture of your movie set.
In Three.js, rendering is handled by the WebGLRenderer class, which uses the GPU to render your 3D scenes in real time. To render your scene, all you need to do is create a new instance of the WebGLRenderer class and call its render method:
const canvas = document.querySelector('.webgl');

const renderer = new THREE.WebGLRenderer({canvas});

renderer.setSize(window.innerWidth, window.innerHeight);
renderer.render(scene, camera);
Code language: JavaScript (javascript)
This code creates a new renderer, sets its size to match the window, adds it to the document, and then renders the scene using the camera we created earlier.
But rendering isn’t just about creating a static image – it can also be used to create dynamic and interactive 3D experiences. For example, you can use animation to make objects move and change over time, or you can use interactivity to allow users to interact with your 3D scene in real time.
Lighting
Lighting is what gives your 3D scene depth, texture, and realism. Think of it like a stage play – the lighting sets the mood and creates an immersive experience for the audience. Without setting up the lighting, you won’t be able to see your objects in the scenes you rendered.
There are several types of lights in Three.js, each with its unique properties and effects. The most common types are AmbientLight, PointLight, and DirectionalLight.
- AmbientLight: This type of light provides a uniform level of lighting throughout the scene. Think of it like a soft, diffused light that illuminates everything equally.
const ambientLight = new THREE.AmbientLight(0xffffff, 0.5);
ambientLight.position.set(0,10,10);
scene.add(ambientLight);Code language: JavaScript (javascript)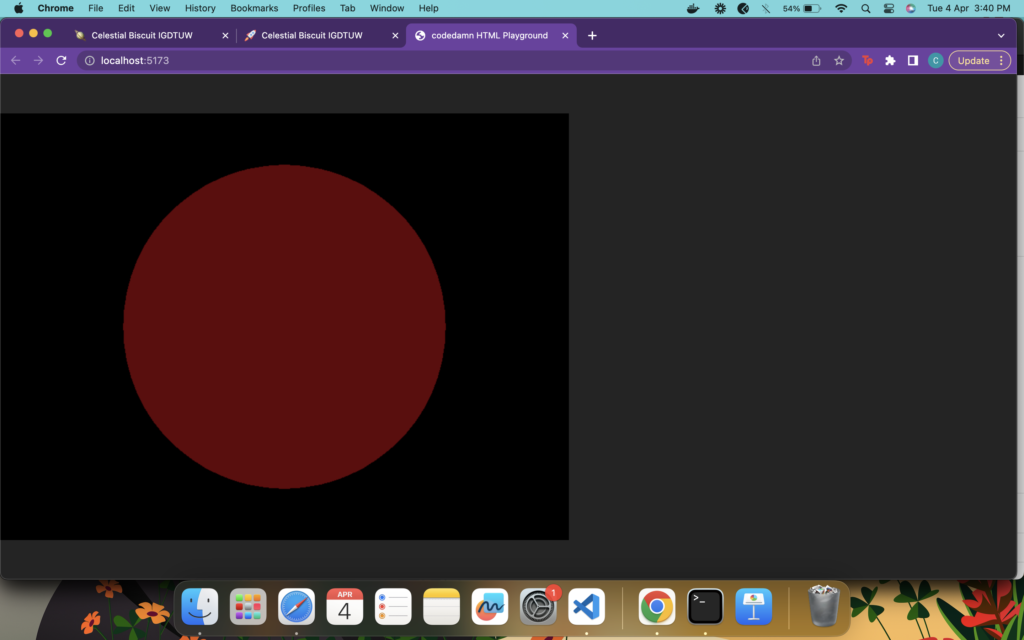
- PointLight: This type of light simulates a single point of light that illuminates objects in a specific area. Think of it like a lightbulb that casts a cone of light in all directions.
const light = new THREE.PointLight(0xffffff,1,100);
light.position.set(0,10,10);
scene.add(light);
Code language: JavaScript (javascript)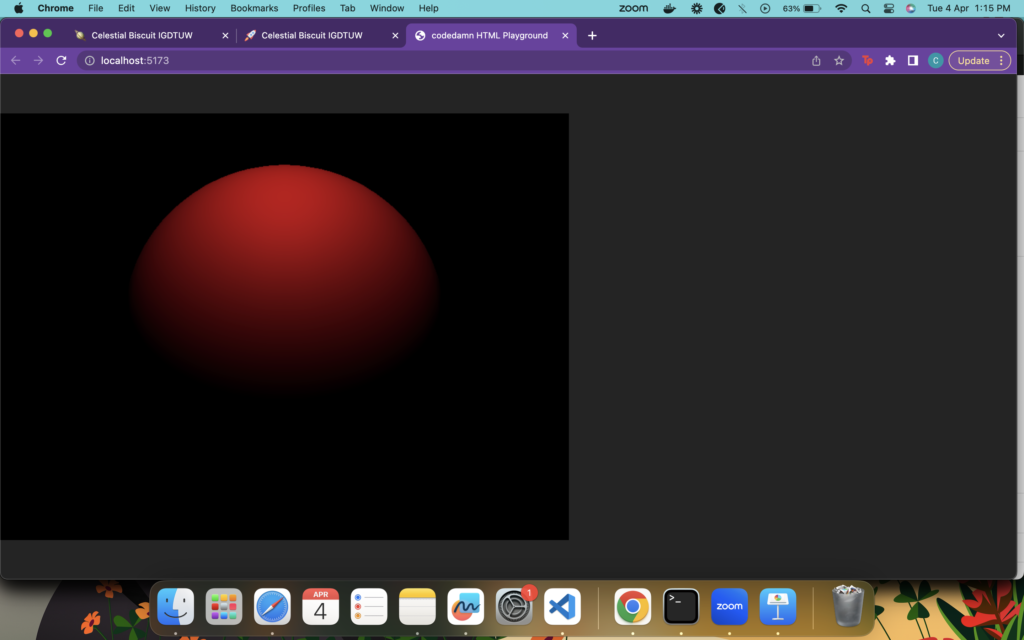
- DirectionalLight: This type of light simulates a distant light source that illuminates objects from a specific direction. Think of it like the sun, casting shadows and creating highlights on objects.
const directionalLight = new THREE.DirectionalLight(0xffffff, 1);
directionalLight.position.set(0, 10, 0);
scene.add(directionalLight);
Code language: JavaScript (javascript)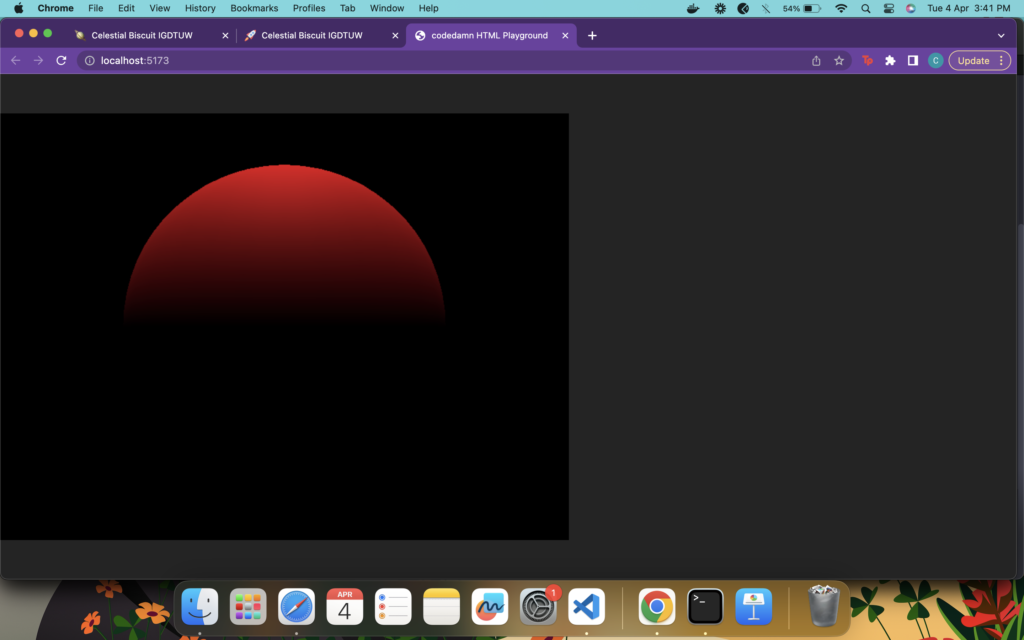
Lighting isn’t just about creating a realistic scene – it can also be used to create dramatic and artistic effects. For example, you can use colored lights to create a moody atmosphere, or you can use volumetric lighting to create a foggy or hazy effect.
Controls
If you’re looking to create interactive and engaging 3D experiences, then controls are an essential topic to master. In this section, we’ll explore the basics of Three.js controls and show you how to create intuitive and responsive user interfaces.
In Three.js, controls are what allow users to interact with your 3D scene in real time. Think of it like a video game – the controls let the user move around, zoom in and out, and interact with objects in the scene.
There are several types of controls in Three.js, each with its own unique properties and effects. The most common types are OrbitControls, FlyControls, and PointerLockControls.
- OrbitControls: This type of control allows the user to orbit around a specific point in the scene, using the mouse to move and zoom.
- FlyControls: This type of control allows the user to fly around the scene, using the keyboard to control movement and the mouse to control direction.
- PointerLockControls: This type of control allows the user to control the camera using the mouse, similar to a first-person shooter game.
To create controls in Three.js, you’ll need to import the corresponding control class and attach it to your camera. Here’s an example of how to create a basic OrbitControls:
import {OrbitControls} from "three/examples/jsm/controls/OrbitControls";

const controls = new OrbitControls(camera,canvas);
controls.enableDamping = true;
controls.enablePan = false;
controls.enableZoom = false;
controls.autoRotate = true;
controls.autoRotateSpeed = 5;
Code language: JavaScript (javascript)
This code creates a new OrbitControls instance and attaches it to the camera and renderer element. You’ll also need to call the controls’ update method in your animation loop to ensure that they’re updated in real-time.
Animations
In this section, we’ll explore the basics of using GSAP with Three.js and show you how to create stunning and smooth animations.
Let’s start with the basics. In Three.js, animations are what give your 3D scene movement, energy, and personality. Think of it like a cartoon – the animations bring your characters to life and make them more relatable to your users.
GSAP (GreenSock Animation Platform) is a powerful and popular JavaScript library for creating animations. It’s easy to use, flexible, and works seamlessly with Three.js. With GSAP, you can create complex and realistic animations with just a few lines of code.
Here is how you can install GSAP using npm:
npm i gsapCode language: Bash (bash)To use GSAP with Three.js, you’ll need to import the GSAP library.
import gsap from 'gsap';
Code language: JavaScript (javascript)
GSAP can animate any property of any object in your scene. You can use GSAP to animate colors, textures, materials, and even the camera’s position and orientation.
In Three.js, animations with GSAP are a powerful tool for creating immersive and engaging 3D experiences. By mastering the basics of Tween objects and experimenting with different properties and effects, you can create stunning and smooth animations that will delight your users and keep them coming back for more.
Conclusion
Congratulations on making it through the Ultimate Three.js Crash Course! By now, you should have a solid understanding of the basics of 3D graphics and how to use Three.js to create stunning and immersive 3D experiences.
We covered a lot of ground in this crash course, from the fundamentals of geometry and materials to the more advanced topics of camera, rendering, lighting, controls, and animations. Each of these topics is a crucial component of any 3D scene, and mastering them will take your skills as a 3D graphics developer to the next level.
This article provides you with just the basics of what you can do with Three.js. With a little bit of creativity and a lot of experimentation, you can create stunning and immersive 3D experiences that will captivate your users and keep them coming back for more.
So what are you waiting for? Start experimenting with Three.js and see what you can create! Remember, the only limit is your imagination.
Frequently Asked Questions
Can I create my own custom materials in Three.js?
Yes, you can create your own custom materials in Three.js using the ShaderMaterial class. With ShaderMaterial, you can write custom shaders in GLSL and specify how the material should interact with light and shadow in the scene. This gives you complete control over the appearance of your objects, allowing you to create unique and custom looks for your 3D scenes.
How do I create complex animations in Three.js?
To create complex animations in Three.js, you can use a combination of GSAP and Three.js animations. First, define the animations you want to create using GSAP’s Tween or Timeline objects. Then, use the onUpdate method of the Tween or Timeline to update the properties of your Three.js objects, such as their position or rotation. This allows you to create complex and interactive animations that respond to user input and other events in your 3D scene.
Sharing is caring
Did you like what Pooja Gera wrote? Thank them for their work by sharing it on social media.
No comments so far
Curious about this topic? Continue your journey with these coding courses:


